We’ve released a new version of MapMaker Interactive. This release allows users to explore rich geographical information about our world in new and better ways than ever before. MapMaker Interactive allows you to become the cartographer by customizing maps and creating map-based narratives called geotours. Here are some highlights from the new release to get you started.
MapMaker at Your Fingertips
The redesigned MapMaker Interactive is responsive on touch interfaces, so you can use it on tablets like iPad. It also works better than ever before on traditional web browsers. Tablets are becoming more common in the classroom, and MapMaker Interactive is a now great tool to use on those devices.
Maps on Maps on Maps
MapMaker Interactive now boasts seven base maps. Depending on the project, you might want to see lots of place names and features, or perhaps a satellite view or a topographic view might be appropriate. With all base maps, you can zoom in to see more detail, and with some (Streets, National Geographic, or Satellite), you can zoom right down to street level.

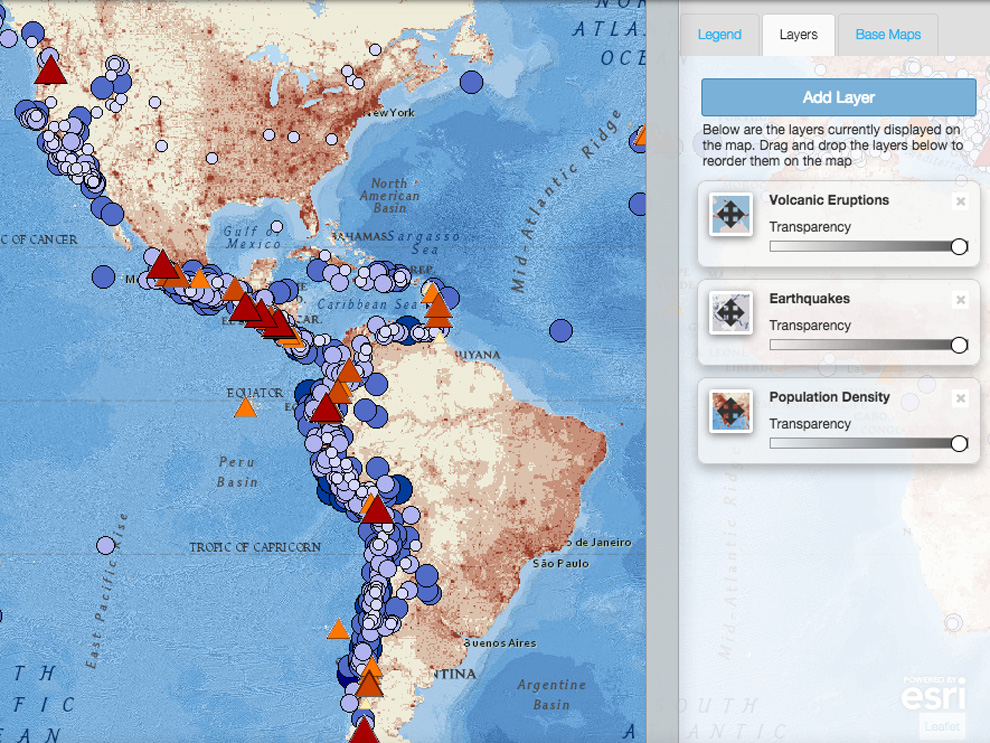
Dig Deeper with Map Layers
Dozens of geographic information layers are built within the tool so that you can explore our world through new lenses. Now you can view multiple layers at once to look for geographic patterns and correlations. Working with map layers in MapMaker Interactive is a great introduction to geographic information systems. Get your students started with MapMaker Interactive to prepare them for more complex map interactions and geographic analysis with GIS later on!

Get Creative with Drawings and Links
You can use the suite of drawing and editing tools to call out places on the map, add custom notes and annotation, and add photos and videos to the map. First, add a drawing or marker to the map. Then, use the edit panel to edit the objects added. From the edit panel, you can add a text, photo, or video link to any object you create on the map. This allows you to add rich information to the map and call out sites of historical significance, current events, your community, or your summer vacation!


Tell Stories with Bookmarks
Once your map is saved, add bookmarks to preserve different views of the map. Each bookmark can have a custom zoom level, base map, map layers, and drawings and objects that you add. Bookmarks allow you to tell stories with map-based narratives. Use them to create tours of your local community or state, collections of current events around the world, or atlases of historical events.
Study Up with Country Facts and Flags
Use MapMaker Interactive as your study guide for learning geography (or perhaps preparing for the National Geographic Bee). Country Facts and Flags allows you to click on any country or territory in the world and receive rich information about that place, including population, economic drivers, and currency.
Coordinate with Latitude and Longitude
Turn on the latitude and longitude feature to see the coordinates of any place on Earth. You can also view lines of latitude and longitude at different intervals. This is a great feature for building students’ map skills while challenging them to find certain places, perhaps as part of a geographic scavenger hunt.
Save Early, Save Often
There is no sign-up required on MapMaker Interactive. When you save your map, we’ll send you an email that includes two links. The first is a read-only link that you can use to share with others or present to a group. The second is an edit link that you can use to return to your map and continue working on it, or even collaborate with others.
When I type in anything in to the “Enter Location” session, it doesn’t do anything. Do you know why this is? Do I have to sign in to get it to work? I tried to follow the tutorial in the help section but even after following it to a T it doesn’t fix my issue. I’ve tried multiple computers and multiple browsers, but this application never seems to work.
Hi Tom! Thank you for your comment. Unfortunately, this is a known issue for Mapmaker Interactive. We’re currently working on a new and improved version.
I can’t get the layers to show up. Is the interactive map no longer supported?
Hi Adam! Thank you for your comment. We are sorry you visited our website during a technical glitch. The layers have been restored. We are currently working to rebuild MapMaker Interactive so issues like this can be avoided.
How do you change the color of the polyline?? Mine is a light gray color that is hard to see, and when I click the “edit layers” button, it doesn’t let me change the color. Does anyone have a way to change the color??? Otherwise, this is great and I really recommend it; you just have to figure some things out.
Good morning, and thank you for using MapMaker Interactive.
To change the color of your polyline:
1. Create the line.
2. Click on the Edit Layers button right above the trash.
3. Click on your line. You’ll know you’ve clicked in the right place if your line turns into a dashed line.
4. Take a look at the Color Settings that appear on the right-hand side of your screen, and adjust.
5. Click “Save” in the Edit Layers menu.
We hope that helps!
Hello!
Love this interactive map.. Will there be a transportation layer implemented in the future?